Friday, November 26, 2010

Brown Bear Series: The Black Sheep


This is the final project in our Brown Bear series for this year.  In previous years I made the gold fish, and have always wanted to try the teacher and the children, but this is as far as I got this year.  This sheep is by far my favorite project and the most creative in the series.  It involves a lesson on ovals, cutting, gluing, using chalk and cotton balls, and creative personalization on the student's part.

To make the sheep, I drew the patterns for the body, head, and face and traced them on to black and gray paper.  The students were able to cut the pieces out and construct the sheep.  They cut out their own legs and drew the sheep's fur with white chalk.  Each sheep turned out totally unique and some were just so funny looking!  I decided to tie this project in with the Baa Baa Black Sheep nursery rhyme and made a hallway display out of it.

Thursday, November 25, 2010

Brown Bear Series: The White Dog


I got the idea for the White Dog from Enchanted Learning's website.  If you are at all interested in crafts for children, Enchanted Learning is a wonderful resource.  I used the pattern (click here) for the "Delightful Dog Card" using white construction paper.  The children could easily construct this dog and personalize the face.  I loved seeing all the different interpretations and creative ideas for the faces!  I also used this same pattern for a "d is for dog" lesson in previous years.

Wednesday, November 24, 2010

Brown Bear Series: The Purple Cat


The Purple Cat is a fun little project and is similar to the square bear.  I started by cutting squares on the paper cutter for the face, then shreds of black for the whiskers, and triangles for the ears.  I showed the students how to glue cotton balls on the face and draw a cat's mouth.  At this point in our paper craft series I have taught the students how to gather their own materials instead of me passing them out.  This teaches them to follow multi-step directions and to take count of what they need.  I put the pieces for the cat at different areas in the room so each area does not get congested with students.  Some students get each piece at a time, while others are able to count and gather all their pieces at once. 


Tuesday, November 23, 2010

Brown Bear Series: The Green Frog


The Green Frog is simple and quick, both to prepare and to construct.  All you will need is a 4" x 6" green rectangle, a 1.5" x 6" red strip, and googly eyes.  Students will fold the rectangle in half to make the head, then curl the red strip of paper on their pencil for the tongue.  Glue the tongue inside the mouth and the googly eyes on the front.  That's it!  The highlight of this project is learning how to curl the paper around a pencil.  Although some may have trouble at first, once the see it can be done they are marveled by this technique.  They later use it creatively on their own when making up their own projects in the art center.

Monday, November 22, 2010

Brown Bear Series: The Blue Horse


Our Blue Horse is made up entirely of rectangles.  For some reason, the rectangle is the trickiest shape for my kindergartners to remember.  This project is perfect for giving them something to refer to when thinking about rectangles.  All of the parts are cut out on the paper cutter.  Since there is no cutting required on the student's part, I wanted to at least include a new cutting skill for them to try...fringing!  I showed them how to fringe the dark blue triangle to make the horse's tail.  In past years, I have noticed my students using this technique creatively in the art center.  They always refer back to the "horse's tail" when they show me something they fringed. 


Below are the measurements of each piece I used:
Head - 4" x 2.5"
Body - 8" x 4.5"
Legs - 1" x 4"
Tail - 4" x 2"
To finish the project, allow the kids to personalize by drawing a mane, a face, hooves, etc.

Sunday, November 21, 2010

Brown Bear Series: The Yellow Duck


Next we see the Yellow Duck!  This project is based on a lesson about circles and also reinforces the skill of cutting on a curve.
  • I started with a standard 18 x 12 piece of yellow construction paper and cut a 3 1/2" strip off the short side.  
  • Out of this strip I cut 3 squares, each 3.5" x 3.5".  These squares are used to make the wings. 
  • I then cut the remaining larger piece in half to make two 12 x 7 rectangles which I will use to trace the circles for the duck's body. To make the body I looked around my classroom for two objects I could trace in the shape of circles, one bigger than the other.  I used a cookie jar lid and a small paper plate.  I traced these on the 12 x 7 paper, making one for each student.  (You could also make patterns of these circles and teach the children to trace them themselves.) 
  • The children can make the wings by folding the 3.5" square in half diagonally, then cutting on that line to make two triangles. 
  • They can cut out their own feet, or you could do what I did and make a freehand pattern and cut out several at a time for them. 
  • Finally, I cut the orange triangles on the paper cutter for the beak. 
Once constructed, each child can personalize their duck by drawing a face.

Tuesday, November 16, 2010

Brown Bear Series: The Red Bird


Brown Bear, Brown Bear, what do you see? I see a red bird looking at me!  Our second animal in the series is the red bird made of a diamond and triangles. I designed this project myself and it goes together very quickly.  You can make one pattern for yourself and cut out a class set of diamonds and triangles on the paper cutter. 

To make the pattern I cut a standard 12"x18" piece of red construction paper in quarters, resulting in four 6"x9" rectangles.  To make the diamond template I folded one rectangle in quarters, opened it up and drew dots on each folded edge, then connected the dots with diagonal lines to make a perfect diamond.  I cut this template out on the paper cutter and it gives you one diamond body and four triangle wings.  Use this template to cut out a class set using several papers at a time.  You will have lots of extra triangles, but these can be used for another project.


Then, using a strip of yellow paper, cut little triangles for the bird's beak.


Students can easily construct this project and personalize it by drawing eyes, feathers, or whatever they think their bird should have.

Monday, November 15, 2010

Brown Bear Project


During the first two weeks of kindergarten, we use a theme based on the book, Brown Bear, Brown Bear, What Do You See? by Bill Martin and Eric Carle.  Our students enjoy the repetitive nature of the story and love to predict which animal Brown Bear will see next.  Many students gain the confidence of  reading because they have memorized the story and can "read" the story independently. 

To reinforce the concepts and tie in other areas of the curriculum, I like to do a hands-on, simple paper craft for each character in the story.  During this time we are also reviewing shapes and colors, so each animal is made of the basic shapes and colors we are learning about.  This project is also a good way to practice proper use of glue, scissor skills and spatial relations as they construct each animal.  My students start the year at all levels and some have never been exposed to scissors or glue.  This project incorporates many of the skills we are learning in early kindergarten and still allows for some creativity on the child's part.
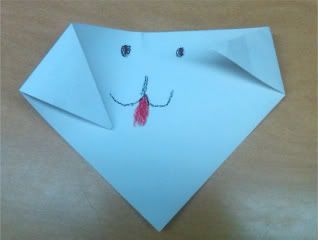
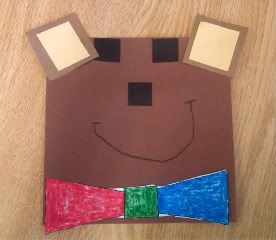
We always start with Brown Bear himself, we call it the "square bear."


This is the simplest of all the projects and I pre-cut the shapes on a paper cutter.  I normally do not like to do a lot of pre-cut art projects, but for our very first kindergarten project we have to keep it pretty simple.  I'm not sure where the pattern for this project originated, I borrowed it from a colleague when i first started teaching. 
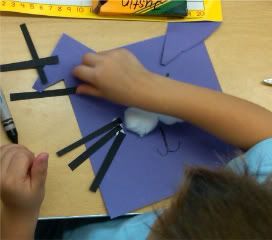
For each bear you will need:
(1) 7"x7" square - dark brown, for head
(2) 2"x2" squares - dark brown, for ears
(2) 1.5"x1.5" squares - light brown, for inner ears
(3) 1"x1" squares - black, for eyes/nose
teacher drawn copy of bow tie for students to cut out and color
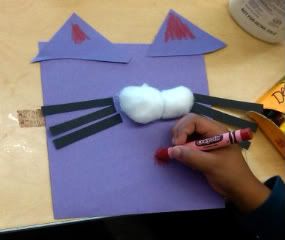
After reading the story and our lesson on squares, I model the project and pass out the materials.The students can personalize the face (some drew ferocious teeth!) and color the bow tie.  This project goes together pretty easy and very few students need help.  Cutting out the bow tie is challenging for those who've never held scissors, but it lets me know who is going to need extra practice with fine motor skills.